Before and After: Planning a Sensitive Historic Home Renovation
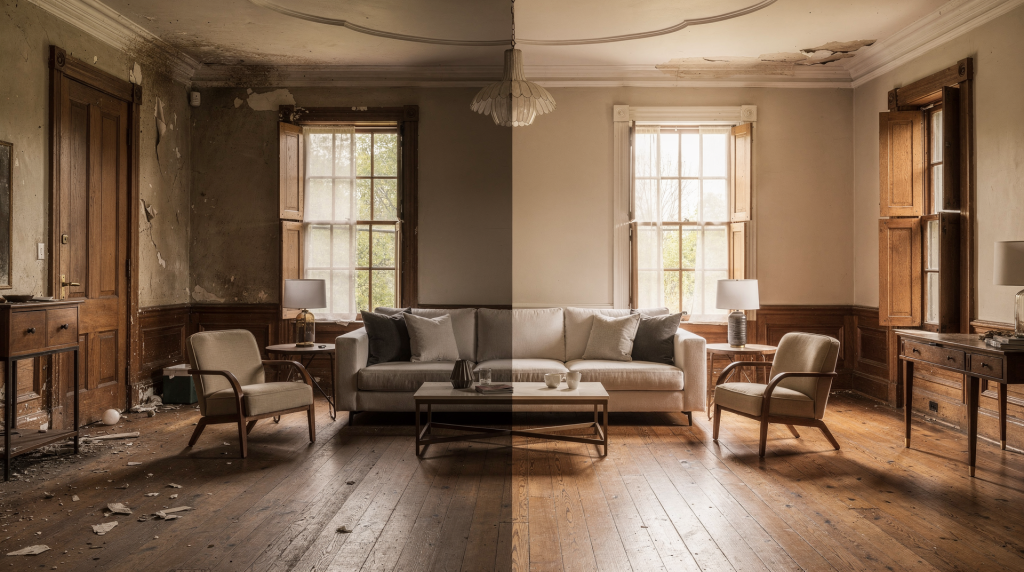
A sensitive historic home renovation is not about freezing a house in time. It is about making the building work for modern life without flattening the character that gives it value. The best projects begin with research, careful diagnosis, and a clear hierarchy of what can be repaired, what must change, and what should stay untouched.
Why historic renovations fail when they start with design
The most common mistake is to begin with finishes, fixtures, or a wish list before understanding the building itself. Older houses were not built like modern shells. They breathe differently, move differently, and often contain layers of later alterations that are part of their story.
I’ve walked into too many houses where someone has already chosen kitchen tiles before discovering that the wall behind the plaster is saturated with trapped moisture, or where a wall has been removed to create an open-plan space without anyone checking whether it was structural or contained a historic chimney breast. The enthusiasm is understandable — everyone wants to get to the satisfying part — but the sequence matters enormously.
Before you draw up plans, identify three things:
- What is original and significant
- What is later but still valuable
- What is already damaged, replaced, or inappropriate
That distinction shapes every decision that follows. If you skip it, you risk stripping out historic fabric that could have been retained or repaired. Once original lime plaster is gone, it’s gone. Once a Georgian sash window hits the skip, no replica quite captures the hand of the joiner who made it.
Start with the building, not the brief
A good renovation brief for a period property should be based on evidence, not assumptions. Historic England advises owners of older homes to understand the history of the building, the features that matter, and whether extra permission is needed before work begins. For listed buildings and homes in conservation areas, that first stage matters even more.
I’ve learned to treat every house as a document waiting to be read. The clues are there: in the brick bond, the thickness of a wall, the wear on a stone threshold, the ghost of a blocked doorway. You just need to know what you’re looking at.
The first questions to ask
- When was the house built?
- What has been altered, and when?
- Which parts are original?
- Which materials are traditional to the building?
- What causes the current problems: decay, moisture, movement, bad repairs, or unsuitable modern interventions?
Useful evidence to gather
- Old photographs
- Sale particulars and archive drawings
- Title deeds and historic maps
- Previous repair reports
- Signs in the fabric, such as patched brickwork, changed openings, or replaced joinery
This research is not decorative. It helps you avoid guessing where evidence already exists. I once worked with a house where the owners were convinced a Victorian bay window was original — until we found an 1840s watercolour showing the same elevation without it. That single image saved them from making decisions based on a false assumption about the building’s age and significance.
Check the legal and conservation context first
Not every historic house is protected in the same way. Some are listed, some sit in conservation areas, and some are simply older buildings with architectural value. The consent route changes depending on that status.
This is not bureaucratic pedantry. The listing system exists precisely because too much historic fabric has been lost to well-intentioned but uninformed alterations. A Grade II listing doesn’t mean you can’t change anything — it means the changes need to be justified and appropriate.
What to confirm before design work
| Question | Why it matters |
|---|---|
| Is the house listed? | Alterations affecting character usually need listed building consent. |
| Is it in a conservation area? | Some changes may need planning permission or extra review. |
| Has the property been altered before? | Existing changes may affect what can be justified now. |
| Which parts are protected? | Not every element carries equal significance. |
If in doubt, speak to the local planning authority early. Historic England also recommends taking advice before making changes, especially where permissions or consents may be needed. I’ve seen too many projects stall at the consent stage because someone assumed rather than checked. A conversation with the conservation officer before you’ve drawn up plans is always cheaper than retrospective applications.
The right sequence for a sensitive renovation
A successful project follows a clear order. Rushing to interior design before technical review usually leads to expensive reversals. The sequence I’ve seen work consistently across dozens of projects goes like this:
Step 1: Commission a proper survey
Use a surveyor or architect with experience in historic buildings. Cornwall Council notes that listed building work requires high craftsmanship and professional skill, and recommends a specialist experienced in historic building work. That advice is practical, not ceremonial.
A general practice surveyor who mainly works on modern construction may not recognize the significance of a lime-ash floor or understand why cementitious pointing is causing spalling in soft brick. You need someone who reads old buildings fluently.
Your survey should identify:
- Structural issues
- Moisture sources
- Roof condition
- Timber decay
- Past repairs
- Incompatible modern materials
- Services that may need rerouting
Step 2: Decide what is repairable
Historic guidance consistently favours repair over replacement. That principle applies to windows, joinery, plaster, floors, and masonry where deterioration is not beyond saving.
I’ve seen sash windows that looked beyond hope — rotten sills, broken cords, flaking paint — brought back to full function by a skilled joiner who spliced in new timber sections and rebalanced the weights. The cost was comparable to a good-quality replacement, but the result retained the original glass with its slight imperfections, the hand-planed profiles, and the material continuity that matters in a period house.
A useful rule of thumb:
- Repair when original fabric survives
- Replace only when the element is beyond practical repair
- Match the original in design, material, texture, and visual quality where replacement is unavoidable
Step 3: Separate necessary upgrades from cosmetic wishes
Not every improvement belongs in the first phase. Some items are essential for safety or performance. Others are optional and may be better delayed until the building’s condition is understood.
Essential:
- Roof repairs
- Drainage corrections
- Structural stabilization
- Damp diagnosis
- Wiring and heating safety
- Fire protection where required
Optional:
- Reconfigured layouts
- Decorative finishes
- Extended glazing
- Large open-plan interventions
Step 4: Test compatibility before committing
Historic England advises using traditional building materials and methods where possible, and checking that any modern materials are compatible with existing traditional ones. In practice, this means a new product must work with the old fabric, not just look similar.
I’ve seen lime mortar specified correctly on paper, only to discover on site that the contractor used a pre-mixed bagged product with cement content because it was “close enough.” It wasn’t. The wall stopped breathing, salts migrated, and the brick faces began to spall within two winters. Compatibility is not a technicality — it’s the difference between a repair that lasts and one that creates new problems.
What “sensitive” actually means in practice
Sensitivity is not refusal to change. It means changing only where needed, and in a way that respects the building’s character. The most sensitive renovations I’ve seen are often the least visually dramatic — they read as careful stewardship rather than architectural statement.
Principles of a sensitive renovation
- Repair first, replace second
- Retain as much original fabric as possible
- Make changes legible but not loud
- Use like-for-like solutions where they make sense
- Keep reversibility in mind where possible
- Avoid speculative alterations that cannot be justified by evidence
Examples of good judgment
- Retaining a repaired sash window instead of replacing it with a uPVC equivalent
- Keeping original room proportions rather than forcing one large open-plan space
- Routing services discreetly instead of cutting through historic joinery
- Reusing original flooring with localized repair rather than wholesale replacement
Each of these decisions looks modest on its own. Cumulatively, they preserve the texture and authenticity that give a historic house its particular quality — the thing that makes it feel different from a new build dressed in period styling.
Common mistakes that damage historic homes
The most expensive errors are often made early and with confidence. I’ve catalogued these across enough properties to see patterns emerge:
Typical problems
- Repointing with hard cement instead of a breathable lime-based mix
- Replacing original windows too quickly
- Blocking ventilation and trapping moisture
- Over-insulating without understanding how the building performs
- Chasing damp with superficial treatments rather than finding the cause
- Removing original plaster, joinery, or floor finishes because they look tired
- Using modern products that cannot be reversed or repaired easily
Some of these errors create hidden problems that take years to appear. Moisture trapped behind incompatible finishes is a classic example: the house looks improved for a season, then decay begins in the fabric. By the time the paint blisters or the plaster blows, the damage has already spread behind the surface.
I recall a Georgian townhouse where cement render had been applied over brickwork thirty years earlier. The owners couldn’t understand why the walls felt cold and damp despite new heating. When we stripped a test patch, the brick faces behind the render had softened to the consistency of biscuit — the trapped moisture had been quietly dissolving them for decades.
Renovation areas that deserve special care
Windows
Historic windows often contribute significantly to the character of a listed building, and Historic England says they should be retained and repaired where possible. If replacement is unavoidable, the new work should match the original in appearance and detail.
Ask:
- Can the frame be repaired?
- Can broken components be spliced in?
- Can draught-proofing improve performance without loss of character?
Well-fitted draught seals, secondary glazing, and heavy curtains often achieve thermal improvements comparable to replacement — without sacrificing original glass and joinery. The embodied energy and craftsmanship in a surviving Georgian or Victorian window is not something we can reproduce casually.
Walls and plaster
Original lime plaster often regulates moisture better than hard modern finishes. If it is sound, keep it. If it has failed locally, patch rather than strip.
I’ve seen entire rooms stripped back to brick because the plaster had some hairline cracks — cracks that could have been filled and stabilized. The replacement gypsum plaster looked smooth and uniform, but it changed the way the room handled humidity, and it erased the slight undulations that told you the wall was built by hand.
Floors
Old boards, stone flags, and tiled floors often survive beneath later coverings. Before pulling them up, inspect what is underneath and whether the original surface can be conserved.
One of the most satisfying discoveries I’ve witnessed was a Victorian hallway where 1970s carpet and hardboard concealed a geometric encaustic tile floor in near-perfect condition. The owners had been about to order engineered oak. A careful lift, a gentle clean, and a few replacement tiles later, they had a feature worth more than any modern floor they could have installed.
Roofs and chimneys
These elements affect both weatherproofing and silhouette. Repairs should respect the original profile, materials, and detailing. A roof is not just a covering — it’s part of the building’s character, and altering its pitch, eaves detail, or covering material can change the whole appearance of a house.
Services
Heating, wiring, plumbing, and data systems should be planned around the building, not imposed on it. Good service design is usually invisible. I’ve seen beautiful rooms scarred by surface-mounted conduit run diagonally across a wall because no one thought to route it through the floor void or behind the skirting. The routing of services is not an afterthought — it’s a conservation decision.
A practical decision framework
Use this simple test on every proposed change:
- Is the change necessary?
- Does it affect historic fabric or character?
- Can the problem be solved by repair instead?
- If replacement is needed, can it match the original?
- Is the material compatible with the building?
- Will the change be reversible in future?
- Have permissions or consents been checked?
If the answer to any of these questions is uncertain, pause and review the proposal before work starts. The cost of a pause is measured in days. The cost of an irreversible mistake is measured in the permanent loss of historic fabric.
Before-and-after thinking that works
The strongest historic renovations show restraint in the right places and confidence in the right ones. They don’t announce themselves with dramatic contrasts — they reveal themselves gradually, in the way the house works better while looking like it was never aggressively altered.
Before
- Overpainted joinery
- Failed patches of cement
- Disconnected services
- Dark, awkward circulation
- Later additions that compete with the original house
After
- Repair-led fabric retention
- Cleaner thermal and service performance
- Better use of space without structural overreach
- Clear distinction between old and new
- A house that feels easier to live in but still unmistakably itself
The aim is not a dramatic transformation for its own sake. It is a better functioning house with its story intact. When it’s done well, visitors may not immediately notice what changed — they’ll just sense that the house feels right.
Checklist: before you begin work
- Confirm legal status and required consents
- Commission a specialist survey
- Record the building before any demolition
- Map original, later, and damaged fabric
- Identify moisture and structural issues first
- Decide repair versus replacement room by room
- Specify traditional or compatible materials
- Ask how each intervention could be reversed
- Build in time for unexpected discoveries
That last point deserves emphasis. Every historic building contains surprises — a hidden beam, a blocked fireplace, a patch of rot behind what looked like sound plaster. If your schedule and budget assume everything will go to plan, you’ll be making rushed decisions under pressure. Build in contingency, both in time and money.
When to bring in specialists
Some projects can be guided by an experienced general contractor. Others need input from specialists early. The distinction is not about prestige — it’s about matching the right expertise to the right problem.
Bring in expert help when the work involves:
- Listed building consent
- Structural movement
- Major damp diagnosis
- Historic joinery repair
- Decorative plaster or masonry conservation
- Complex retrofit decisions
- Roofs, chimneys, or major external changes
Historic building work is rarely improved by improvisation. The earlier the right specialist is involved, the fewer mistakes are made on site. I’ve seen a conservation-accredited structural engineer save a project tens of thousands by identifying that a cracked lintel could be stitched rather than replaced — something the general contractor had assumed was impossible.
Retrofit and energy upgrades: proceed carefully
Many owners now want to improve comfort and reduce energy use. That is reasonable, but older buildings need a whole-house view. Historic England’s technical advice includes retrofit and energy-efficiency guidance, and emphasizes practical assessment before changes are made. A building should be understood first, then upgraded in ways that suit its construction.
Solid-wall buildings behave differently from cavity-wall construction. They absorb and release moisture slowly, and their thermal performance depends on that equilibrium. Disrupt it with impermeable insulation, and you risk condensation within the wall, timber decay, and mould.
Best practice usually includes:
- Diagnosing heat loss before adding insulation
- Improving draught control first
- Checking moisture behavior before sealing anything
- Keeping breathable construction layers working together
- Avoiding solutions that trap condensation inside the fabric
The cheapest and most effective improvements often come first: draught-proofing, loft insulation, heavy curtains, and repairing existing windows rather than replacing them. These measures respect the building’s physics while delivering genuine comfort gains.
FAQ
Do all historic home renovations need permission?
No. The requirement depends on whether the house is listed, in a conservation area, or subject to other controls. For listed buildings, alterations affecting character usually need listed building consent. Even unlisted period houses may have restrictions if they fall within designated areas — always check with the local authority before assuming consent isn’t needed.
Should original windows always be replaced?
No. Historic England recommends retaining and repairing historic windows where they make a positive contribution to significance. Replacement should be the exception, not the default. A repaired original window with secondary glazing often outperforms a replacement in both thermal efficiency and longevity — and it preserves the building’s character and material authenticity.
Is it better to use modern materials because they are stronger?
Not necessarily. Compatibility matters more than strength alone. Historic England advises using traditional materials and making sure modern products are compatible with the existing fabric. A material that is stronger than the surrounding historic fabric can cause damage — hard cement pointing in soft brickwork is a classic example where the “stronger” material destroys the original.
What is the biggest mistake homeowners make?
Starting with aesthetics instead of diagnosis. The second biggest mistake is replacing original fabric that could have been repaired. Both stem from the same impulse: wanting to see results quickly. Patience at the investigation stage pays dividends for decades afterward.
Can a historic home still be comfortable and energy efficient?
Yes, but the process needs care. The best results usually come from a whole-house approach that balances comfort, moisture movement, and conservation. It’s entirely possible to live warmly and efficiently in a period house — it just requires working with the building’s existing performance characteristics rather than against them.
Conclusion
A sensitive historic home renovation succeeds when it respects the building’s evidence, repairs what survives, and changes only what must be changed. Start with research, check the legal status, use specialist advice early, and let the house’s original logic guide the design.
Done well, the result is not a compromised compromise. It is a historic home that works better, lasts longer, and still tells the truth about where it came from. The best compliment such a renovation can receive is that it looks as though nothing much happened — while the owners know exactly how much care and thought went into every decision.