Historic Windows: Repair, Restoration, and Energy Efficiency
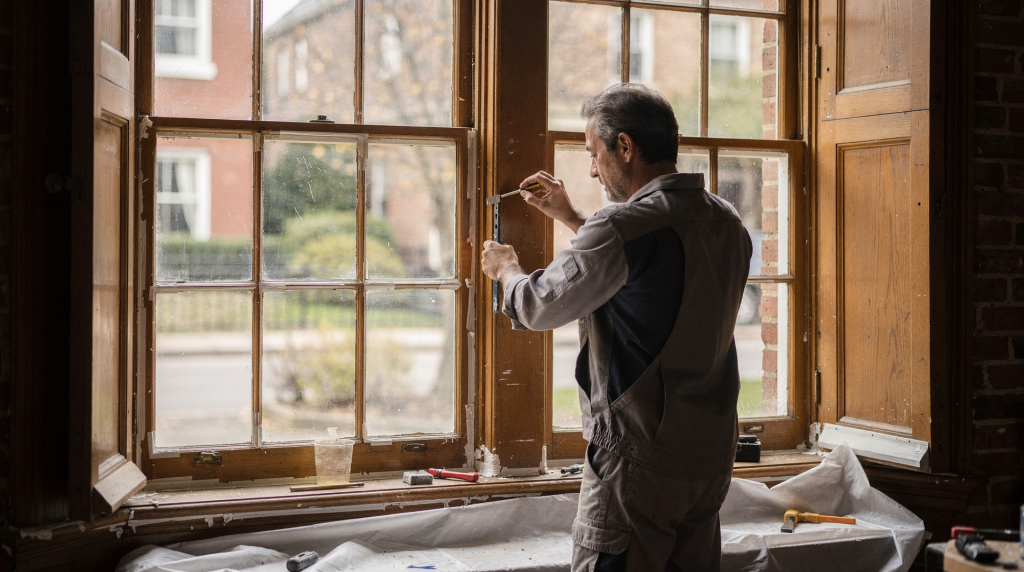
After fifteen years of walking through period houses with buyers who assumed every draughty sash needed replacing, I learned to pause at the window before saying anything. More often than not, the frame was sound, the glass was original, and the problem was something mundane: a broken cord, paint sealing the sash shut, or putty that had given up decades ago. The window wasn’t failing — it was just neglected. That distinction matters enormously, because once original fabric is removed, you cannot put it back. The proportions shift, the glass loses its slight irregularities, and the facade quietly becomes something else.
What follows is a practical guide for owners of older houses and estates who want to make informed decisions about their windows. The real question is rarely “repair or replace?” It is usually “what needs fixing, what can be improved, and how far can I go without damaging the building’s character?” The right answer depends on condition, craftsmanship, and how the windows are actually failing.
Why historic windows matter
Original windows are part of the building’s fabric, not just a decorative feature. They affect the facade, the proportions of the opening, ventilation, daylight, and the way the house behaves seasonally. When I assess a period property, the windows tell me things: whether the house was built in one campaign or altered later, whether the glazing bars are authentic or thinned out in a twentieth-century “improvement,” whether someone has already replaced sashes with units that sit awkwardly in the reveals.
Historic windows are also repairable in a way many modern replacement units are not. Traditional sash windows, for example, are made of separate parts — stiles, rails, glazing bars, each individually shaped and joined — that can often be individually repaired or renewed in kind. That makes them more adaptable over time and usually more sustainable than a full replacement. A well-maintained Georgian or Victorian sash can outlast several generations of sealed double-glazed units, precisely because it was designed to be taken apart and serviced.
Repair vs. replacement: how to decide
The first step is a close inspection. Preservation guidance consistently recommends evaluating condition before making any decision, because many windows that look beyond saving only need targeted work. I have seen sashes so painted-over they appeared fused to the frame, yet underneath the layers of twentieth-century gloss, the timber was dry and perfectly serviceable.
Start with these questions
- Are the sashes still structurally sound?
- Is the rot localized or widespread?
- Do the windows open, close, and latch properly?
- Is failure caused by paint buildup, damaged cords, loose glazing, or air leakage?
- Has the frame actually failed, or is the problem mostly maintenance-related?
If the sash and frame are fundamentally sound, repair is usually the preferred option. I would go further: even when there is moderate decay, a skilled joiner can often splice in new timber — what the trade calls a Dutchman repair — and preserve the majority of the original material. If deterioration is severe and extensive, then selective replacement of failed components may be appropriate, but only after repair options have been exhausted. The threshold for replacement should be high, not because of sentimentality, but because original windows are made from slow-grown timber that is denser and more durable than most modern softwood equivalents.
Common problems with historic windows
Most historic-window issues are predictable. The good news is that many are fixable without changing the whole unit. Over the years, I have compiled mental lists of what typically goes wrong, and the pattern is remarkably consistent across properties of different ages and construction types.
Typical defects
- Failed putty or glazing compound
- Loose or cracked panes
- Sticking sashes caused by paint buildup
- Broken sash cords or chains
- Worn parting beads and stops
- Air leaks around the frame
- Minor rot at sills or lower rails
- Failed locks, pulleys, or counterweights
A window that is hard to operate is not automatically a candidate for replacement. Very often, the problem is friction, misalignment, or poor maintenance rather than fatal damage. I recall a Victorian house in Bath where the drawing-room sashes had not been opened in forty years. The owner assumed they were warped beyond repair. In fact, the lower sash had been painted shut with at least eight layers of gloss, and the cords had simply snapped from age. Once the paint was cut, the sashes lifted out cleanly, and the repair was straightforward.
What a proper historic window repair includes
A well-done repair restores function first, appearance second, and efficiency through sealing and fit. The exact work depends on condition, but a typical repair can include:
- Removing failed paint where needed
- Repairing damaged wood
- Rebuilding or tightening sash joints
- Reglazing loose or failed glass
- Replacing broken cords or chains
- Restoring smooth sash movement
- Adjusting meeting rails so the sashes close tightly
- Repairing stops, parting beads, and sill issues
- Adding weatherstripping after fit is corrected
That sequence matters. Weatherstripping alone will not solve a sash that is loose, warped, or out of alignment. The window has to fit properly before it can seal properly. I have seen owners invest in expensive brush seals only to find the sash still rattles because the parting bead was worn and the meeting rail had dropped. Fix the geometry first, then address the draughts.
How historic windows become more energy efficient
Energy efficiency does not always mean replacement. In fact, several preservation sources point out that repaired historic windows, combined with practical upgrades, can perform very well. The key is understanding where the losses actually occur. In a typical single-glazed sash, the majority of heat loss is not through the glass itself but through air infiltration around the edges and at the meeting rail. That is a fixable problem.
Best upgrades, in order
- Repair the window so it operates correctly.
- Seal obvious air leaks with caulking or compatible sealants.
- Add weatherstripping.
- Consider storm windows or interior panels.
- Use insulated shades or other secondary measures where appropriate.
That order matters because the biggest losses in old windows are often caused by air infiltration, not just glass type. If the window is draughty, loose, or poorly maintained, fixing those problems usually delivers more benefit than jumping straight to replacement. I have stood beside repaired eighteenth-century sashes on a cold January morning and felt no perceptible draught — the room was comfortable, the heating demand was modest, and the windows were still exactly as the joiner had made them in 1780.
Weatherstripping, caulking, and glazing repairs
These are the simplest and most cost-effective improvements for many historic windows. Done well, they are barely visible and entirely reversible. Done poorly, they can trap moisture, block movement, or create maintenance headaches down the line.
What they do
- Weatherstripping reduces leakage where moving parts meet — typically at the meeting rail, along the stiles, and at the sill.
- Caulking seals small gaps around the casing and frame, particularly where the frame meets the masonry.
- Reglazing restores the seal around individual panes and helps stabilize the glass, preventing rattling and reducing air passage.
These measures should be done carefully. Historic windows need materials that do not block future repairs or trap moisture in the wrong place. I favour traditional linseed-oil putty for reglazing because it remains slightly flexible and breathes, unlike some modern compounds that harden and crack. For weatherstripping, look for systems that can be removed and renewed without damaging the timber. Poor sealants or overapplication can create new problems instead of solving old ones — I have seen silicone smeared across sash joints so aggressively that the window could no longer close, let alone seal.
Storm windows: one of the best upgrades
Storm windows are repeatedly identified as a strong option for improving thermal performance without sacrificing original sash. This is not a new idea — many historic buildings originally had secondary glazing in some form, whether interior shutters, exterior blinds, or removable winter sashes. The principle is sound and well-tested.
Why they work
- They create an extra insulating layer
- They cut drafts
- They can improve comfort noticeably
- They preserve the historic window behind them
Storm windows may be installed on the exterior or interior, depending on the building, detailing, and conservation goals. Exterior storm windows protect the original sash from weather but may be restricted on listed buildings or in conservation areas where external appearance is controlled. Interior panels are often more acceptable to planning authorities and can be removed seasonally. Well-fitted storm windows can make a major difference, especially on single-glazed historic windows — in some cases, the thermal performance approaches that of modern double glazing, without losing the original glass and joinery.
When storm windows are a good choice
- The original windows are sound but underperforming
- You want better comfort without replacing the sash
- The house is draughty in winter or overheats in summer
- You need a reversible intervention that respects historic fabric
I have specified storm windows on several projects where the brief was to improve energy performance without altering the street elevation. In each case, the improvement in comfort was immediate and measurable, and the original windows remained untouched behind them.
A practical inspection checklist
Before deciding on any intervention, inspect each window systematically. I recommend working room by room with a notebook and a camera — it is tedious but invaluable later, especially if you are phasing work over several years or briefing contractors.
Check each item
- Frame condition
- Sill condition
- Sash condition
- Glass condition
- Glazing compound condition
- Cord, chain, or balance condition
- Lock and latch condition
- Evidence of moisture damage
- Evidence of insect damage
- Paint buildup at moving joints
- Drafts at perimeter and sash joints
Photographs help. A window schedule is even better, especially in larger houses, because it lets you track condition, prioritize repairs, and document what was done where. I have used simple spreadsheets with columns for location, condition notes, priority rating, and recommended action. When you have thirty or forty windows to manage, this discipline pays off.
Repair, restore, or replace?
Here is a simple rule of thumb: repair the original window when the material is still fundamentally there and the failure is localized. The decision tree is not complicated once you have inspected properly.
| Situation | Best approach | Why |
|---|---|---|
| Loose glazing, drafty sash, broken cords | Repair and weatherstrip | The window is usually still salvageable |
| Minor sill rot or localized decay | Dutchman repair or selective timber repair | Preserves original fabric while fixing the defect |
| Sash is sound but inefficient | Repair plus storm window | Improves performance without losing historic character |
| Severe, widespread deterioration | Selective component replacement or carefully considered replacement | Repair may no longer be practical |
Replacement should not be the default answer for an old window that is merely inefficient. In many cases, the most sustainable choice is to retain and retrofit the original unit. The embodied energy in an existing window — the timber, the glass, the craftsmanship — is already spent. Throwing it away and manufacturing something new is rarely the greener option, whatever the marketing claims say.
Common mistakes to avoid
Don’t replace too early
A historic window that looks tired may only need repair, not removal. Once original fabric is gone, it is difficult to recover the same proportions, details, and craftsmanship. I have seen replacement sashes with glazing bars that are too thin, glass that is too flat, and horns that are missing entirely — small differences that cumulatively change the character of a facade.
Don’t start with insulation before fixing operation
If the sash does not close correctly, you will still have drafts. Repair the mechanics first. This seems obvious, but I have visited houses where expensive secondary glazing had been fitted to sashes that were still rattling in their frames because the cords were broken and the meeting rail was misaligned.
Don’t ignore moisture
If a window is rotting, there is usually a source of water ingress or condensation that must be addressed at the same time. Repairing the timber without fixing the cause is a temporary measure. Check the sill drip, the pointing around the frame, and the internal humidity levels before assuming the rot is just age-related decay.
Don’t assume modern replacement is automatically better
Replacement units may improve one metric — often the U-value of the glazing — but lose repairability, heritage value, and often long-term durability. A sealed double-glazed unit has a finite lifespan, typically twenty to thirty years, after which the whole sash may need replacing again. A traditional single-glazed sash, properly maintained, can last two centuries or more.
A sensible workflow for homeowners
If you own a historic property, this is a practical way to approach the project. I have used this sequence on my own houses and recommended it to clients for years.
Step-by-step
- Survey every window and note visible defects.
- Photograph each opening and record whether it operates properly.
- Prioritize windows with rot, leakage, or safety issues.
- Repair the sash, frame, glazing, and hardware before upgrading performance.
- Add weatherstripping and caulking where appropriate.
- Consider storm windows for major comfort gains.
- Reassess after the heating or cooling season.
This approach protects the building’s character while targeting the real causes of energy loss. It also spreads the work and cost sensibly: tackle the worst windows first, learn from each repair, and refine your approach as you go.
When to call a specialist
Some work can be handled by a careful homeowner — reglazing a single pane, easing a sticking sash, replacing a broken cord if you understand how the weight pocket works. But historic windows often benefit from a specialist repairer, especially where timber decay, distorted sash, or fragile glass is involved. The joinery in a period window is precise, and mistakes can be costly.
Call a specialist if:
- You suspect hidden rot in frame or sill
- The sash weights or balances are failing
- The glass is fragile or historically significant
- The windows are listed, protected, or within a conservation area
- You need a restoration plan for multiple windows at once
In conservation areas and listed buildings, unauthorised window replacement can lead to enforcement action, so specialist advice is not just prudent — it may be a legal requirement. A good conservation joiner will understand the materials, the techniques, and the planning context.
FAQ
Are historic windows less energy efficient than new windows?
Not necessarily. Once repaired and upgraded with weatherstripping, caulking, and storm windows, historic windows can perform very well. The comparison is not straightforward because the tested U-value of a new unit does not account for air leakage around a poorly fitted frame, nor for the thermal mass and behaviour of the original wall construction.
Is it better to restore or replace old windows?
Restoration is usually the better first option if the original windows are still structurally sound. The original materials — dense, slow-grown timber and hand-drawn glass — have qualities that are difficult to replicate in modern products.
What is the most cost-effective upgrade?
For many properties, the best low-cost improvements are repairing operability, sealing air leaks, and adding weatherstripping. These measures address the primary source of heat loss — air infiltration — and can be done incrementally.
Do storm windows help historic sash windows?
Yes. Properly fitted storm windows are one of the strongest ways to improve comfort and energy performance while keeping the original window in place. They create a still air gap that significantly reduces heat transfer and draughts.
Can I make historic windows efficient without changing their appearance?
Often, yes. Careful repair, discreet weatherstripping, and well-selected storm windows can improve performance with minimal visual impact. The best solutions are those that read as part of the building’s history rather than as modern interventions.
Conclusion
Historic windows are rarely disposable. In most cases, they should be inspected, repaired, and upgraded before replacement is even considered. The best results usually come from combining craftsmanship with practical efficiency measures: repair the sash, seal the leaks, restore operability, and add storm windows where needed.
For historic homes, that approach protects both comfort and character, which is exactly the point of good preservation. A window that has served a house for a hundred and fifty years deserves a careful assessment, not a skip. With the right work, it can serve for a hundred and fifty more.